My Tables
Store and manage your own tables.
This is action list of table:
Create
View
Download
Edit
Setting
Move to
Copy to
Share with
Delete
Create
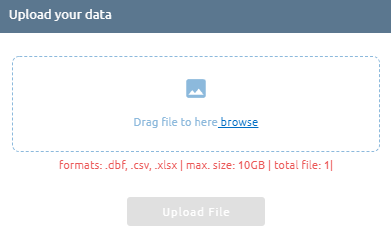
Users can create new table by upload file (.dbf, .xlsx, .csv) into box or empty area of Table.
Way one:
Step 1: Click “Create new”:

Step 2: Upload file:
You can click file upload area -> choose file or drag and drop file into file upload area:
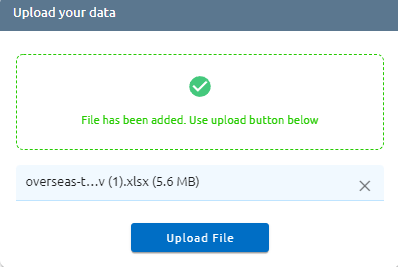
Step 3: Click “Upload” button
Way two: Drag and drop file into empty area of Table.
After clicking button, a task will be created, wait task success and check in the menu Table
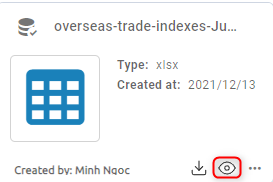
View
Click eye icon to view table
In screen view table, you can:
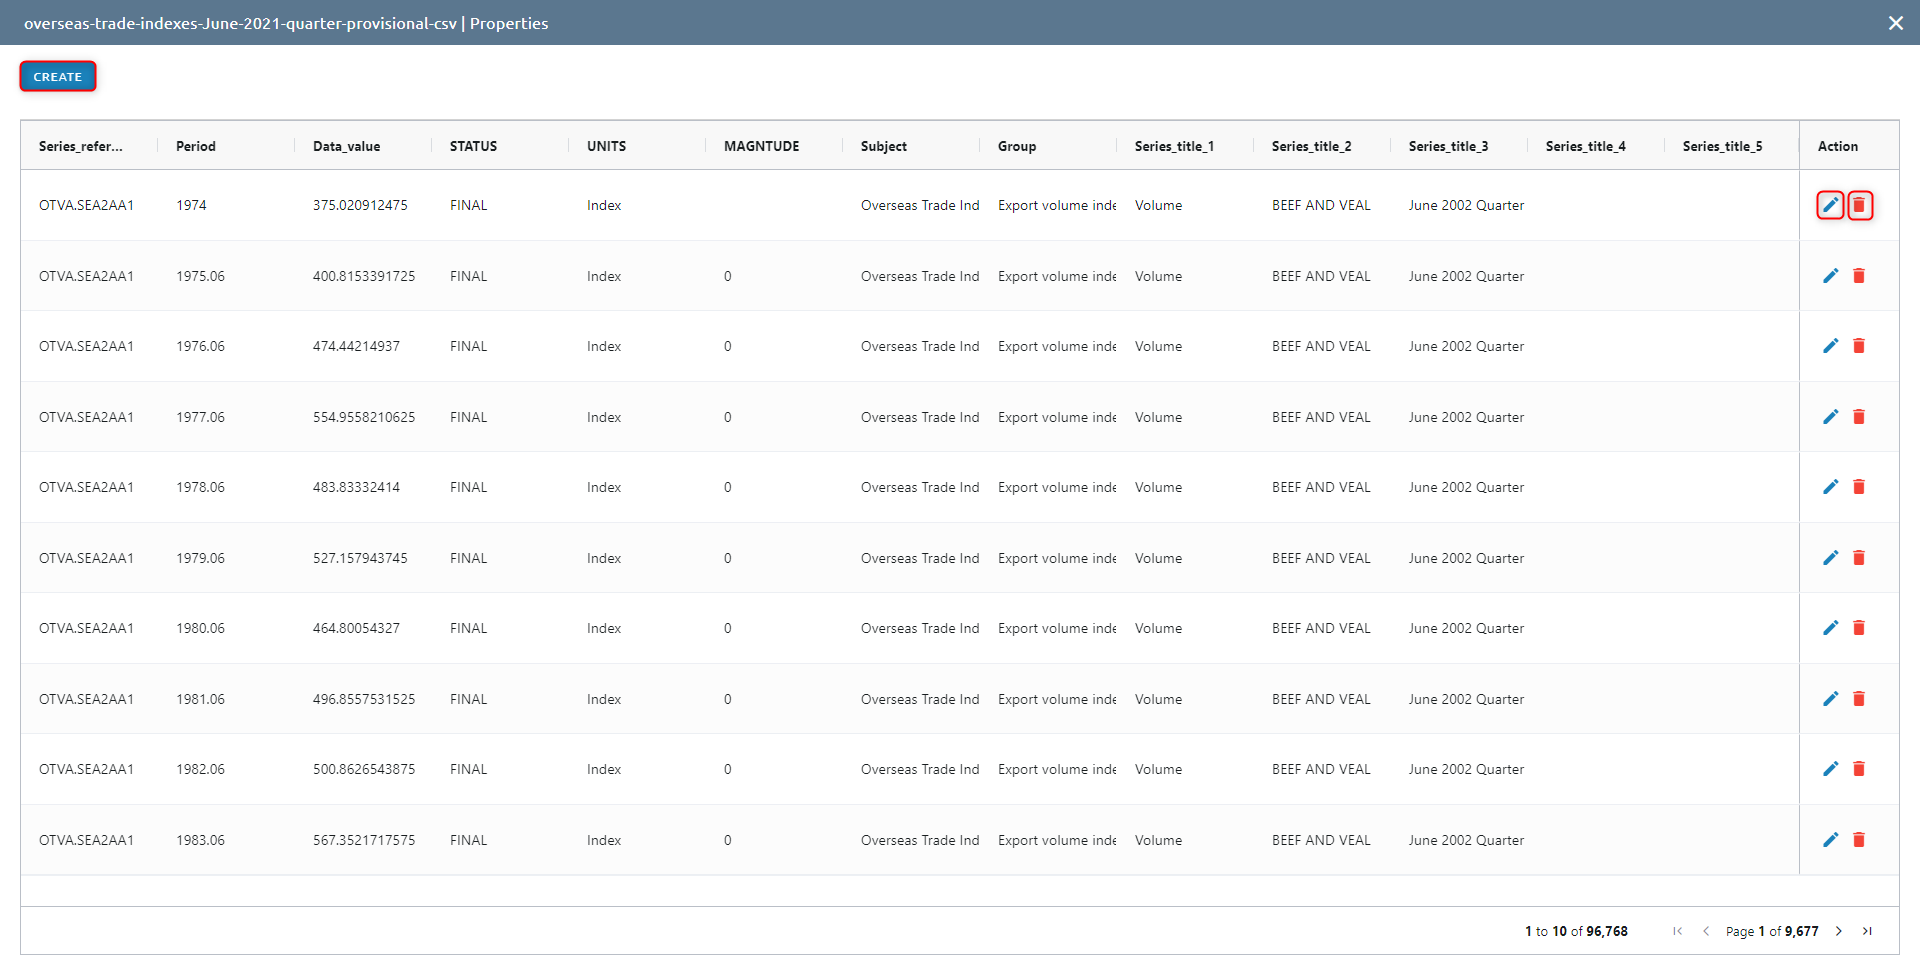
Create new record by click “Create” button.
Edit record by click pencil icon at each record.
Delete record by click garbage icon.
Download
Click download icon to download table. All tables will be download with .xlsx format and auto open when download complete.
Edit
Step 1: Click icon to show action list
Step 2: Click Edit button in action list
Step 3: Type new
Step 4: Click Confirm button
Setting
Allow to add, edit, delete column in table.
Move
Similar to Move vector.
Copy
Similar to Copy vector.
Delete
Step 1: Click icon to show action list
Step 2: Click Delete button in action list
Step 3: Click Confirm button
Note: You can select many tables and process them (Select multiple tables -> click right mouse -> select action (share, delete, copy, move)).